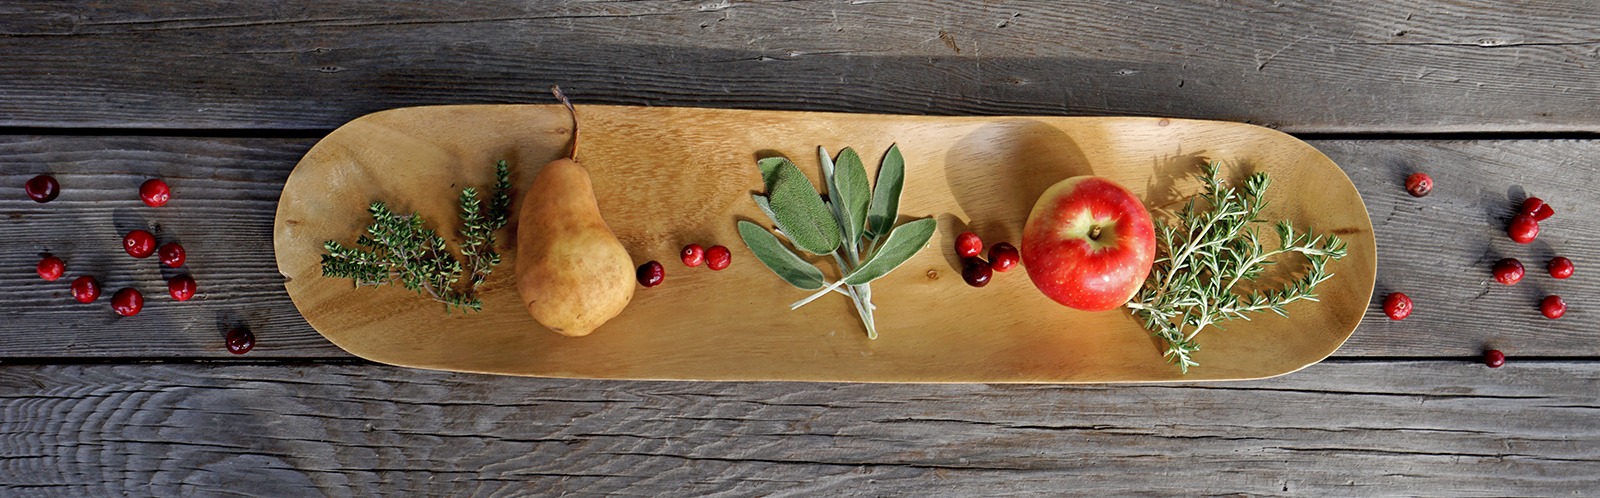
Herbs, Butter & Holiday Pies
November 26TH 2019
I have used herbs in my pies since I was in my early twenties. I believe my first herb-pie combo was apple-rosemary and, surely, I got the idea from Marth Stewart. She was one of few cooking “idols” I looked to for ideas. For many of us who consider ourselves creative home cooks, she was one of the original sources of inspiration.
I never had much interest in pies until I started to herbalize them. The common way to cook fruit pie seems to take the flavor and freshness out of the apple, pears, and other fruits. To me, this means that most just taste sweet and a little bland. I’m not a one-dimensional cook, and the idea of making something sweet just for the sake of it seems like a waste of time. What interests me is making pies with some depth and the appearance of some secrets. When I make pies, I like to coax out not just the freshness and flavors of seasonal ingredients but, also, the textures and nuances of initial and finishing aromas and flavor essences. Herbs and spices help me do just this.

Herbs and Pie
Most advice you will hear me give (no matter the topic) is… Don’t be closed-minded. Anything is possible. This goes for flavor combinations, as well. When it comes to holiday pies, there are some pre-set, well-known flavor combinations that we can easily incorporate into pies. Maple and sage in a pumpkin pie are perfect examples, or think rosemary and apple. The key is to be subtle with the herbs when using in pie. Herbs should appear more like whispers in your pie that help tease out some of the predominant flavors. Even the butter in the crust can stand a flavor boost with a dash of fresh herbs, spice, and zest. I prefer to put the herbs in the crust in most my pies, but it really depends on the fruit or filling. Just make sure you don’t use any stems of the herbs and that the leaves are chopped up super fine. Also, I like to let my fillings macerate a little if I am using herbs. This allows me to pre-make a good portion of the pie (saving time), and I infuse more flavor. I never pre-cook my fruit, so this method also helps soften the fruit. Make sure you strain out any excess juices if you are macerating apples, pears, and hard fruit. You can even pre-make your pumpkin pie filling and let it macerate with herbs and spices, simply add eggs to it just before cooking.

Pie Dough
There are a lot of opinions on making pie dough and pie crust, just like there are a lot of opinions on everything else in this world. Think of the advice out there as just that. You can use it to inform yourself when gaining firsthand experience, but this firsthand experience comes only by practicing. This is what will lead you to your pie truth.
I learned long ago that there are many ways to achieve the same successful goal of a crisp crust and tasty filling. The most important thing is to keep everything in the dough-making stage COLD. Some people even go to great lengths pre-chilling bowls and food processor blades. I make the dough in front of an open window (assuming it’s cold outside) and then place the cubed butter in the freezer for about 5 minutes before using it. Ice cold water is also key. It basically ensures your butter stays cold. Some, including myself, swear by adding vodka or vinegar to the ice water. I can’t explain the science behind it, but I truly believe this has my pie crust better – flakier and crispier – since I started doing this years ago. The cold butter pretty much ensures that a flaky, crispy crust will be possible. I think we can all agree that is yummy.

Pre-baking the bottom is another controversial topic yielding a lot of opinions. I think of pre-baking as an easy way to ensure success, especially when making pumpkin and custard-filled pies. As an alternative to pre-cooking, many prefer to chill the dough to eliminate the pre-cook step. I have done it both ways, and I think more attention to detail is required if you don’t pre-bake the shell for custard pies. So, I always do. Regardless of what kind of pie or pie shell I am baking, I always pre-chill it for about 30 minutes before baking. This helps ensure the butter firms up in the crust, giving it a better chance of becoming flaky and crispy.
Most of us have been taught to chill the dough for hours; for me this doesn’t seem worth the time, except that it’s nice to get the dough-making out of the way early. I have seen plenty of successful pie makers make pies immediately after making the dough, and then just chilling the entire pie before baking it. They turn out fantastic. If you’re going to pre-chill the dough, make sure to take it out of the refrigerator for at least 10-15 minutes before rolling it out. You need it to be pliable when you roll it. Many new pie-makers make this mistake, mainly due to poor advice and recipes. Pastry bench scrapers are a cheap and amazing tool to help work with dough. I use a big pancake spatula to help me gently transfer the rolled dough, usually folded into a wedge. Use the coldest, hardest surface you can find to roll your dough. Don’t roll it on wood or plastic.
Use your scraps to make decorations. I like to roll them into a square and refrigerate it before using it to make the decorations. It gets the dough solid again.
Here is one of the best tips I learned from an ex sister in-law: Keep a dust buster in the kitchen and use it for everything. I have a simple model that has all washable parts which works great on my counter tops during dough making, it makes the cleanup process so much easier and I couldn’t make dough without one!

Basic Pie Dough
Makes 1 -12 inch pie crust (or a top and bottom)
Basic pie dough is one of the easiest recipes to master. There are really only a few important details to remember, and even those I have seen time after time tossed out aside by creative pie masters. Cold butter and using ice cold water is something everyone agrees on. Some folks insist that, if you want the best pies then the dough must be made by hand. I totally disagree. For me, it’s about the nuances of flavors that we extract in the process and/or add in our use of ingredient usages. A pie dough is the perfect medium to subtly add nuances of the season and accents to the pie ingredients and that means its great for fresh herbs. This is one recipe that I refer to as an IDEA RECIPE, which means take the idea and make it your own. – Mix and mingle zests, spices, and herbs for your ideal crust flavor profile. I add vinegar or vodka to the ice water mix, which many experts say yields a flakier crust. I think vodka works best in terms of flakiness, but I like using interesting vinegars as I think they impart more subtleties of flavor that makes the final pie taste amazing. I care more about that than flakiness. If you want super flaky, make the pie dough by hand and make sure everything is very cold. I’m a food processor dough person all the way. It is literally one of the only recipes I use it for. I usually whip up several at a time and freeze them, making it worthwhile to pull out the machine. When I am feeling creative and have the time, I make and use herbal compound butter.
Ingredients
2 ½ cups all-purpose flour
1 teaspoon salt
2 sticks (1 cup) salted butter, cold and cut into small cubes (herbal compound butter)
¼ – ½ cup ice water mixed with 1 tablespoon vinegar or vodka
Directions
Add the flour and salt to the bowl of the food processor, and process until mixed. Add the butter cubes and pulse until the butter and flour mixture turns into a course pebble-like consistency. Add ¼ cup of the ice water through the top of the processor while you continue to pulse. We are looking for the dough to “just” come together so you might need to add 1-3 more tablespoons of the ice water to make this happen. Once the dough comes together, dump it out of the processor onto a lightly floured work surface and push it together into a ball. It should not be crumbly, nor too moist. You can add a little flour or water to your hands to adjust this. Once it comes into a ball, shape it into a flat disc, making sure not to handle the dough too much once it comes out of the processor. (If you are making a top and bottom divide the dough into two flat discs, one a bit larger than the other.) Place the dough disc(s) in a plastic bag. I use compostable ones, and they work great. Refrigerate until use. Take out of refrigerator ten minutes before use.
Make sure you are making a pre-baked pie crust you poke little holes in the bottom of the pie crust dough before baking it, this allows the steam to escape while its baking and so it doesn’t puff up. You don’t need to do this with a filled pie.

Fall Herb Compound Butter
Makes 1 cup (2 sticks) compound butter
For many of us that are my age or older, compound butter is often remembered as a steak topping in the days when the fancy steakhouses were the thrill. Heck, even the non-fancy ones served compound butter on top of a sizzling grilled steak. Compound butter is basically a butter that’s softened and then flavored (and often whipped) with a multitude of flavor enhancers like fresh herbs and spices. It’s then made cold and hard again before use. It’s a simple concept that often people forget about, and it’s a potent way to impart a little extra flavor onto pancakes, freshly toasted baked goods, vegetables, and meats. Rosemary blue cheese compound butter on a ribeye is still one of my favorites. But I am also a big fan of herbs and citrus butters on vegetables, and warming fall spices in a compound butter can be magnificent when making crispy skin chicken. Making herbal compound butter is a great way to utilize leftover herbs, and it keeps for 2-3 weeks in the refrigerator and months in the freezer.
While making a pie for a friend (after making a batch of Fall Herb Salt for the same friend), I thought, “Why don’t I flavor the butter for my pie?” Eventually I did and, like all my ideas which flow from my signature unravelling process, all of my favorite pie recipes are now made with herbal compound butter.
Typically, compound butters start with unsalted butter, but I never have that in my fridge, so I start with salted butter because, hey, even sweet things need a tinge of salt. A hand mixer works great if you want whipped compound butter. That’s too much work for me, so I use a bowl and a fork.
Ingredients
2 sticks (1 cup) salted butter, softened
1 teaspoon super-finely chopped sage leaves
1 teaspoon super-finely chopped marjoram leaves
1 teaspoon super-finely chopped rosemary leaves
1 teaspoon super-finely chopped thyme leaves
½ teaspoon Aleppo pepper
½ teaspoon white pepper, finely cracked
¼ teaspoon cinnamon
½ teaspoon orange zest
¼ teaspoon salt
Directions
In a medium mixing bowl, mix the soft butter with the rest of the ingredients until well mixed. Scoop the mixture onto the center of a piece of parchment paper and wrap it into a tight log. Chill the butter at least 3 hours before using. At this stage you can also place it in a freezable container and freeze for up to 3 months.

Old Fashioned Apple Pie
Makes 1-9 inch pie
This is definitely a classic pie….
The Fall Herb Compound butter gives this a slight boost of fall flavor that I like. I use a combination of tart and sweet apples and apples with various textures—pink ladies, honey crisp, Cortland, granny smith… Peel or don’t peel; it’s up to you. I rarely do. Be creative in your cuts but be a little uniform so they cook evenly. You will need about 8-10 cups of apple filling for a 9-inch pie. You can make whatever type of top you prefer, I love using a shot glass to make holes, others like the more complicated lattice style, which I include in the instructions, whatever you prefer, the idea is that there is plenty of opportunity for steam to escape.
Ingredients
Basic pie dough, enough for a top and bottom
8 medium sized apples (about 3 pounds), peeled, cored, and cut into wedges that are about ¾ inch thick
2 tablespoons lemon juice
1 teaspoon lemon zest
¼ cup sugar ( add an additional ¼ of a cup if you want it sweeter)
¼ cup light brown sugar
2 tablespoon all-purpose flour
¼ teaspoon ground cinnamon
¼ teaspoon freshly grated nutmeg
1/8 teaspoon ground ginger
1/8 teaspoon ground allspice
1/8 teaspoon ground cardamom
2 tablespoons heavy cream, for brushing
Directions
Make 2 batches of the pie crust ahead of the pie making. Before making the pie, remove the dough from the refrigerator for about 10 minutes so they become slightly more pliable just before mixing the apples.
Mix together the apples, lemon juice, and zest in a large mixing bowl until the apples are covered in the juice. Toss in the sugars, spices, and flour, and mix with your hands until the apples are totally coated with all of the dry ingredients. (You can make this part a few days ahead of baking your pie. Just strain off juices before filling the dough.) Refrigerate until use.
Roll out 1 dough disc on a lightly floured surface into a 12-inch circle. Transfer the pre-greased pie dish. Fold the edges all around the circle under and form a high-standing rim. Crimp the folded rim, by making small folds or indents. This will be the visible edge of your pie. Chill the dough in the refrigerator while you finish the rest of the pie.
Roll out the second dough disc into a 13-inch round. Cut it into twelve 1-inch wide strips. Fill the pie with the apple mixture. Arrange half of the strips over the filled pie, in a parallel pattern. Space them evenly over the pie. Take every other strip, and fold it up over the center midline of the pie. Lay an additional strip of dough perpendicular, right below the fold up of the strips that were just laid. Fold the strips back down over the one you just laid. Next fold up, the same way the strips that you haven’t folded up yet and fold up. Repeat the process until all the strips are used and the top of the pie is latticed.
To seal the edges, trim any long pieces hanging over the edge of the pie, and gently tuck them into the edge into the apple mix. Brush the top with the cream. Place in the refrigerator to chill for about 20-30 minutes before baking.
Pre-heat oven to 400°F. Lightly grease a 9-inch pie dish.
Bake pie 45-60 minutes or until its golden brown and juices are bubbling up through the lattice. Cool completely before serving.

Maple Sage Crusted Pumpkin Tart
Makes 1 9-inch tart
This is basically a pumpkin pie, but I love using a tart pan and a sweeter crust. The sweet crust, I think is needed because I don’t like the custard part too sweet, I prefer it to be pumpkin-y and nuanced with the spices versus sugar sweet. If you want to get ultra-fancy on this one toast whole spices and then grind them for the spice mix. It will give the finished pie a bit more smoky-sweet essence and sultry feel.
Ingredients
For the tart:
1½ cups all-purpose flour
½ teaspoon salt
1 tablespoon chopped superfine sage leaves
1 stick butter, cold and cubed
3 tablespoons maple syrup
1 egg yolk
1 or 2 tablespoons cold milk
For the filling:
3 eggs
1 can (12 ounces evaporated milk)
¾ cup brown sugar
2 cups pumpkin puree (canned or fresh)
2 teaspoons freshly grated ginger
2 teaspoons ground cinnamon
1 teaspoon freshly grated nutmeg
¼ teaspoon ground all spice
¼ teaspoon ground cardamom
¼ teaspoon ground clove
¼ teaspoon finely ground white pepper
¼ teaspoon vanilla extract
1 tablespoon maple syrup
1 tablespoon cornstarch
Directions
In a food processor combine the flour, salt, and sage, and mix well. Add the butter cubes into the flour and pulse several times until a coarse meal is formed. Add the maple syrup and the egg yolk and pulse a few more times. Then as it is running, pour in 1 tablespoon of the cold milk until a ball is formed, which will be just about instantly. You may need the additional tablespoon if it doesn’t form immediately after pouring in the first. Turn off the machine and form the dough into a disc and place in a plastic bag. (I use the compostable ziplocks.) Refrigerate until use. Take out of refrigerator ten minutes before use.
Heat the oven to 375° F. Roll the tart dough onto a 13-14 inch circle to fill an 9 inch dish tart pan. Press the dough gently into the tart mold. Roll the rolling pin over the top of the mold to cut off excess dough. Place in the refrigerator to chill at least 30 minutes. Pre-heat the oven to 375° F in the meantime.
Make sure you are making a pre-baked pie crust you
Once the tart dough is chilled, poke little holes in the bottom of the tart crust dough before baking it, this allows the steam to escape while its baking, so it doesn’t puff up. I also like to place a piece of parchment paper and place a similar sized oven proof dish down on it, ensuring that it stays flat and crisp. Pie weights do the same thing, as do beans or but I tend to think that’s wasteful since you can’t use them afterwards. You can save them and reuse them though. Place the shell in the oven and bake about 20 minutes until the crust us set. Take off the weight and let the bottom brown for about 10 minutes. Cool.
Adjust the oven temperature to 325° F. In the meantime, in a large bowl, whisk together the eggs, evaporated milk, and brown sugar. Add the pumpkin puree, spices, extracts, and cornstarch, and whisk until totally smooth. At this point taste the mixture and adjust spices to taste preference. Place the tart pan on a baking sheet and pour the filling into the tart dough filling the mold. Place in the oven and bake until the center of the pie is cooked through and does not jiggle loosely. The crust should be golden brown. This process could take up to 50 minutes. When a stick inserted into the center comes out clean, the tart is done. Take out of oven and allow to cool. After at least 10 minutes you can slip the tart through the ring mold. Cool at least 30 minutes before refrigerating to serve chilled. Serve with Nutmeg Cardamom Whipped Cream.

Nutmeg Cardamom Whipped Cream
Makes 2 cups
It’s super easy to put a little spice into a whipped cream. Cardamom and freshly grated nutmeg cuts the richness of the cream a bit and extracts the spices flavors from the apples when you take a bite. The key to a great whipped cream is not to make it too sweet, let the fresh cream be a highlight ingredient.
Ingredients
1½ cup heavy whipping cream
¼ cup sugar
1 teaspoon freshly grated nutmeg
1 cardamom pod, shells removed and crushed
Directions
With a mixer, mix all ingredients until whip cream with soft peaks is formed!

Ginger Cranberry Pear Crumb Pie
Makes 1 9-inch pie
This is my favorite pie. I used to make a cranberry pear coffee cake for Thanksgiving, and that was a bit hit wherever I went. This is the first year I am changing that tradition, and I am a big fan of the result. Still, the same perfumey-sweet pears intermingle with tart cranberries and fall spices, but now it’s in a pie form. That feels more traditional for Thanksgiving. A slightly salty and orange zest crust pulls extra magic into the final dish.
Peel or don’t peel the pears. It’s up to you. I don’t peel pears because it’s hard, and their skin has never bothered me.
Ingredients
For the pie dough::
2 ½ cups all-purpose flour
1 teaspoon salt
¼ teaspoon freshly grated nutmeg
1 teaspoon orange zest
2 teaspoons finely chopped rosemary leaves
2 sticks (1 cup) salted butter, cold and cut into small
¼ – ½ cup ice water mixed with 1 tablespoon white balsamic vinegar
For the pear filling:
8 medium sized (ripe but still a little firm) pears, sliced into thin wedges
¾ cup fresh cranberries
2 teaspoons orange zest
2 tablespoons orange or lemon juice
¼ cup light brown sugar
¼ cup all-purpose flour
1 tablespoon salted butter or Fall Herbal Compound Butter
For the crumb topping:
1 ½ cup all-purpose flour
½ cup brown sugar
¼ cup sugar
½ teaspoon ground cinnamon
½ teaspoon ground cardamom
½ teaspoon ground nutmeg
½ teaspoon ground black pepper
¼ teaspoon salt
¾ cup chopped nuts (ideally pecans)
1 stick (8 tablespoons) butter, melted
Directions
For the dough/crust:
Add the flour, salt, nutmeg, zest and rosemary to the bowl of the food processor, and process until mixed. Add the butter cubes and pulse until the butter and the flour mixture turns into a course pebble-like consistency. Add ¼ cup of the ice water through the top of the processor while you continue to pulse. We are looking for the dough to “just” come together, so you might need to add 1-3 more tablespoons of the ice water to make this happen.
Once the dough comes together, dump it out of the processor onto a lightly floured work surface, and push it together into a ball. It should not be crumbly, nor too moist. You can add a little flour or water to your hands to adjust this. Once it comes into a ball, shape it into a flat disc, making sure not to handle the dough too much once it comes out of the processor. Place it in a plastic bag. I use compostable ones, and they work great. Refrigerate until use. Take out of the refrigerator ten minutes before use.
Roll out dough a lightly floured surface into a 12-inch circle. Transfer the pre-greased pie dish. Fold the edges under all around the circle, and form a high-standing rim. Crimp the folded rim, by making small folds or indents. This will be the visible edge of your pie. Chill the dough for at least 30 minutes while you prepare the filling and the topping.
For the pear filling:
Toss together the pears, cranberries, citrus zest and juice, sugar, and flour until mixed. Dollop the butter throughout and gently fold it into the mixture and set aside, while you make the crumb topping.
For the crumb topping:
Mix together flour, sugar, spices, and nuts. Slowly mix in melted butter, and mix until a crumbly mixture is formed.
To assemble and cook the pie:
Pre-heat oven to 400° F. Arrange the pear and cranberry mixture into the chilled pie dough, arranging the peaks so that they lay flay and stacked. Cranberries will be in-between the layers. Make the top mounded in shape. Drizzle a few spoonfuls of the pear liquid over the top but not more than 3 tablespoons.
Cover the entire top of the pie evenly with the crumb mixture. Bake at 400° F for 30 minutes and then reduce the oven temperature to 325° F and bake for another 40 minutes, or until the top of the pie is golden brown and crispy. Make sure the top doesn’t burn. Cover it with foil if it starts to burn too early in the cooking process.
Remove from the oven and allow to cool for at least an hour and half before eating. I prefer to let stand at least 3 hours and heat up again slightly before eating.


